Sony Clié on Mac OS X
Hello to all visitors!
This page is provided is a guide and aid in those who wish to sync their Sony Cliés with a Macintosh computer running Mac OS X (I do not know anything about doing this under OS 9 - if anyone does, please let me know). At the time of writing, all of the instructions were accurate. However, I can make no guarantees, and be sure to backup all your data before proceeding (for example, to a MS using the MS Backup application on your handheld).
This procedure involves modifying the files inside contents of application packages. If you're uncomfortable with this, there isn't much you can do, I guess.
Anyway, before you begin, you'll need, at the very least, an application called USB Prober. This app is made by Apple and is part of the Developer Tools (Mac OS X 10.0, 10.1, 10.2) and XCode (10.3, 10.4), both of which are available for free from Apple's developer website. If you'd like just the app and have no need for the rest of the tools, you can get it on its own from here.
In addition, a property-list/XML editor would be very useful. While it's not necessary, it makes the task a hell of a lot easier than using TextEdit. As part of the developer tools mentioned, an application called Property List Editor nicely does the job. Just like USB prober, you can get it as part of the whole developer tools package, or just download it here.
Lastly, you will need a hexadecimal to decimal converter. If you don't have one, a very good and small AppleScript called Hex&Decimal can be obtained here, written by Kevin Kelleher.
When you've got those three apps ready, take your Clié handheld, plug in its USB cable into your computer (and obviously connect it to the Clié as well). Next:
- Open up the USB prober application and make sure that the first tab, Bus Probe, is selected. Also, be sure that the Refresh automatically checkbox is checked.
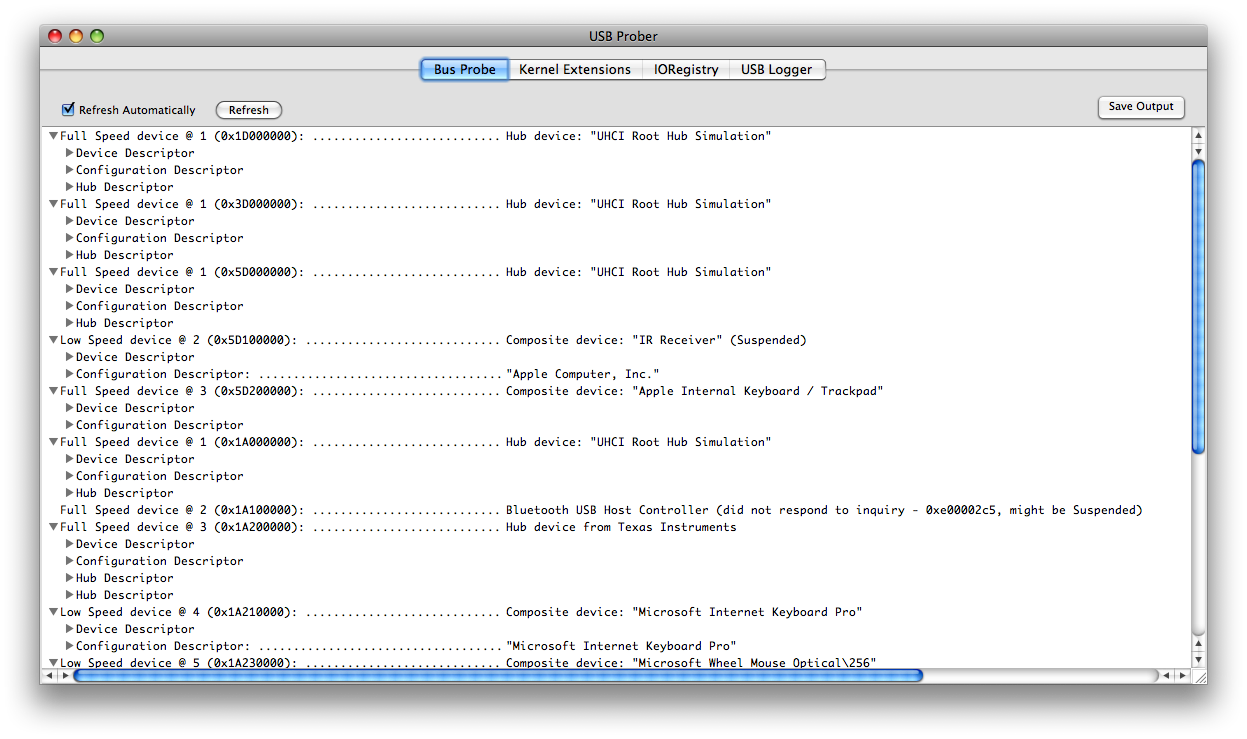 The main USB Prober window with the Bus Probe tab selected
 - Turn on your Clié handheld, and launch the HotSync application. Next, make sure that the Local tab is selected there, and that the connection method (drop-down menu under the HotSync button) selected is Cradle/Cable. Now tap on the HotSync button in the center of your handheld's screen.
- The HotSync operation will fail, but that doesn't concern us (if it doesn't fail, then you're all done and there's nothing for you to do!). Look at the USB Prober window and a new line device should appear with a name which will say, after the line of periods, Composite Device: "Palm Handheld". If you don't see such a line, scroll down and look through the entire window. Depending on your OS and Prober version, the new device might appear at the top or at the bottom.
- Click on the triangle next to the Device Descriptor line that's under our new Sony Device. Look down in the list that appears and look for the line that says Device VendorID/ProductID. Write down these two values, because they are exactly what we need to make HotSync work for us. The VendorID should probably be 0x054C.
- Now launch Hex&Decimal app. In the window that appears,enter the ProductID into the text field, omitting the 0x part of it, and press enter (or return).
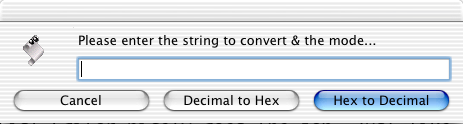 The startup window of Hex&DecimalIn the window that will pop up, the decimal value will be given; write it down.
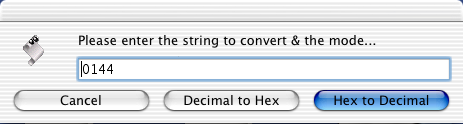 ProductID entered into the field, without the preceding 0x (for a Clie UX50)If your VendorID was 0x054C, the decimal value is 1356; take a note of this as well.
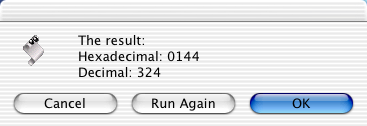 The resulting window, which gives you the equivalent decimal value
 - Now with these values, we will go to three places on your disk and modify three files in the same fashion. The application packages we need are:
- /Applications/Palm/HotSync Manager
- /Applications/Palm/Transport Monitor
- /Library/Application Support/Palm HotSync/Transports/USB


- The procedure for all of these will be similar, but since the path is a bit different for the last one, I'll explain in two groups.
For HotSync Manager and Transport Monitor, navigate to the folder that they are contained in, and follow the following steps for both (separately, of course)
- Right-click on the application (ctrl-click for single-button mouse users) and then click on Show Package Contents in the menu that appears.
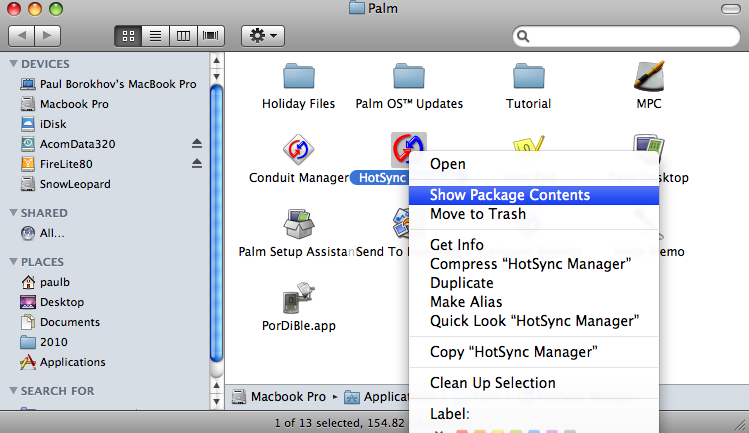 Revealing the package contents using the Finder
 - Open the Contents folder, then the Plug-ins folder.
- Right-click on USBNotifier, and click on Show Package Contents
- Open the Contents folder
- Now, double-click the file Info.plist. If nothing happens, or it opens with the wrong application, open Property List Editor manually and then choose File->Open... and just drag the file from the Finder into the Open dialog. Here's what it should look like now:
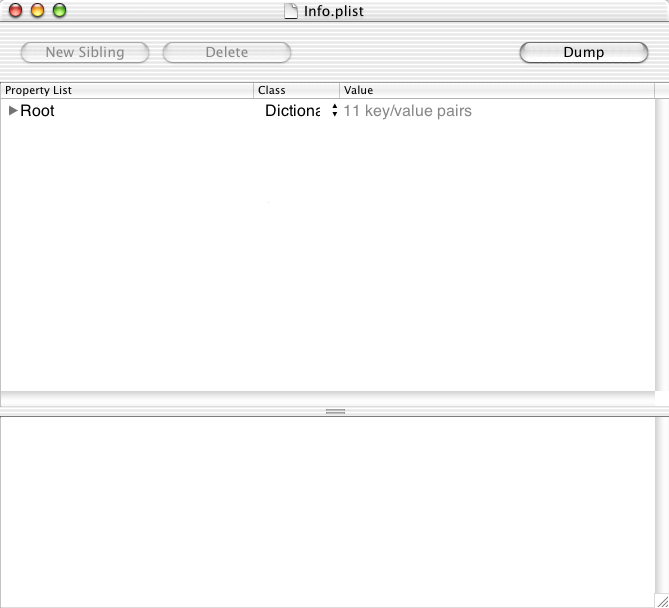 Info.plist opened in Property List Editor
 - Next, click on the disclosure triangle to the left of "Root". A bunch of new text will appear, so scroll to the very bottom (if you need to) and click on the disclosure triangle next to USBDevices. Here's what it should look like now:
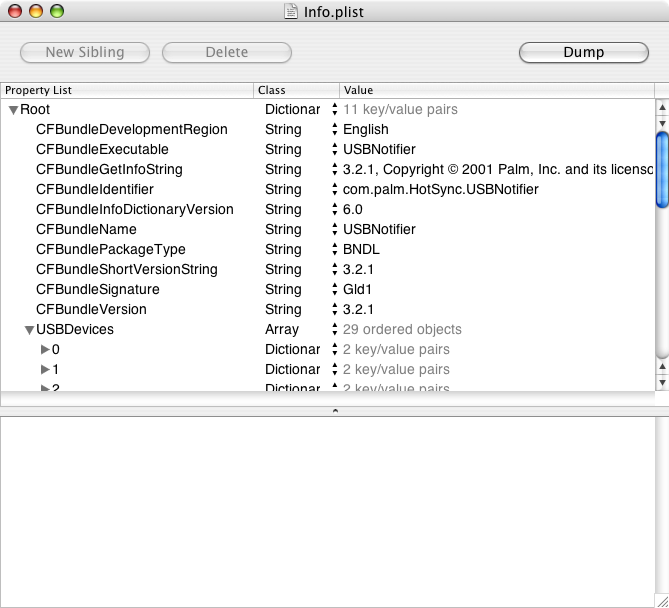 Info.plist after we have clicked on 2 disclosure triangles
 - Now, click on USBDevices. The button in the upper right corner of the window, which was previously disabled and read "New Sibling" will now become enabled and read "New Child". Click on it. The new child value will become editable and will be selected; it will be at the top of the list of items under USBDevices. In the Class column, you will notice that the class is set to "String".
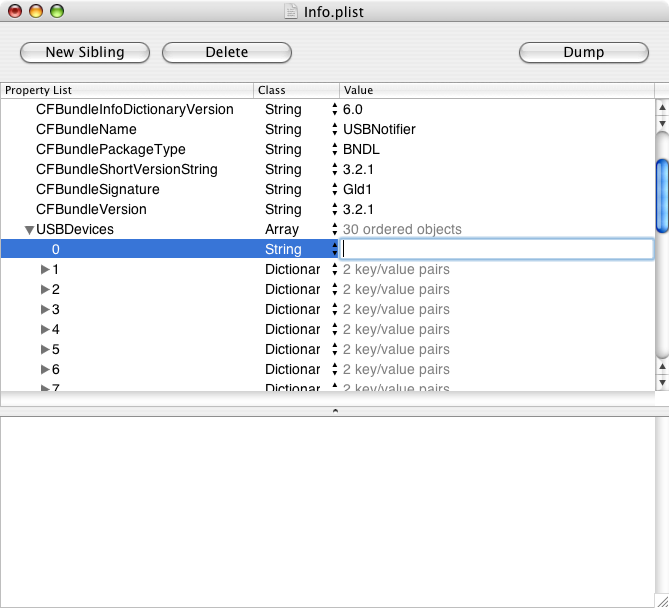 Your now-modified .plist document with a new child created under USBDevices
 - Click on the word String, and choose Dictionary from the drop-down menu which will appear. Now click on the disclosure triangle next to the 0, make sure that the line is still selected, and click on New Child twice now. Here's how it should look:
 The document window as it should look after you have added two children to the 0 element
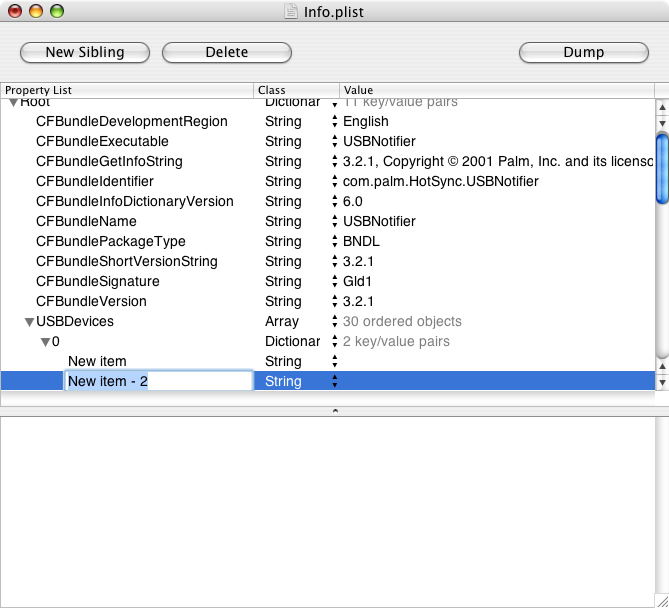
 - In the field which is now selected, type USBProduct and then double-click on the New Item field (just above where you just typed). In this field, type USBVendor. Now, in the Value column, to the far right, double-click on the value corresponding to the USBVendor field, and enter the VendorID decimal value that you had written down earlier. Now double-click in the corresponding field next to USBProduct, and enter the ProductID decimal value that you had written down earlier. Here's an example of what your window will look like (in this case, I'm putting in values for a SONY Clié UX-50).
 Final version of our edited Info.plist file
 - Now, just save the file using command-S or File->Save.
- Now, follow these exact same steps for Transport Monitor, which is located in the same folder as HotSync Manager.
- Right-click on the application (ctrl-click for single-button mouse users) and then click on Show Package Contents in the menu that appears.


- For the last package, /Library/Application Support/Palm HotSync/Transports/USB, do the following:
- Right-click it and select Show Package Contents as usual. Open the Contents folder — the Finder might refuse, telling you that there's no application to "open" the folder, in which case you can just right-click it and then choose Show Package Contents yet again.
- There will be an Info.plist inside the Contents folder. Open it and edit it in the same manner we did above. Notice, though, that the USBDevices entry will be further down and you might need to scroll down to see it in the document window.
- Save this file as well.
- Now, logout and log back in. Plug in the USB cable into your Clié, then into your computer, and start a Cable/cradle HotSync from the handheld. Just make sure that USB is checked off as a connection option in Hotsync Manager on the computer. If it still doesn't work, try restarting your computer with the USB cable unplugged.
| CS projects | |
|---|---|
| Production software | FMenu — WebGrabber |
| Class projects | CS 61b |
| Misc | MediaWiki Installation caveats – Sony Clie on Mac OS X – Black screensaver |